
Crimson Feature of the Month: Data Entry Dashboard
Adding contributions to your database is easy with Crimson’s Data Entry dashboard. These tools are designed to simplify the process of batching, balancing, and loading gifts, while ensuring accuracy and compliance for your campaign or committee.
Accuracy Meets Efficiency
Data entry is the backbone of accurate fundraising records. With Crimson’s batch tools, you can:
Save time using default settings and auto-numbering.
Prevent errors with built-in balancing and validation.
Maintain compliance with clearly defined fields and FEC memo tracking.
Export and audit contributions easily from the same menu.
A Centralized Hub for Batch Management
From the Crimson Home dashboard, click on Data Entry in the sidebar. Once the Data Entry dashboard is opened, users can view, edit, or create batches of contributions with just a few clicks. Whether you’re entering a few checks or hundreds of online gifts, the batch view helps you keep everything organized.
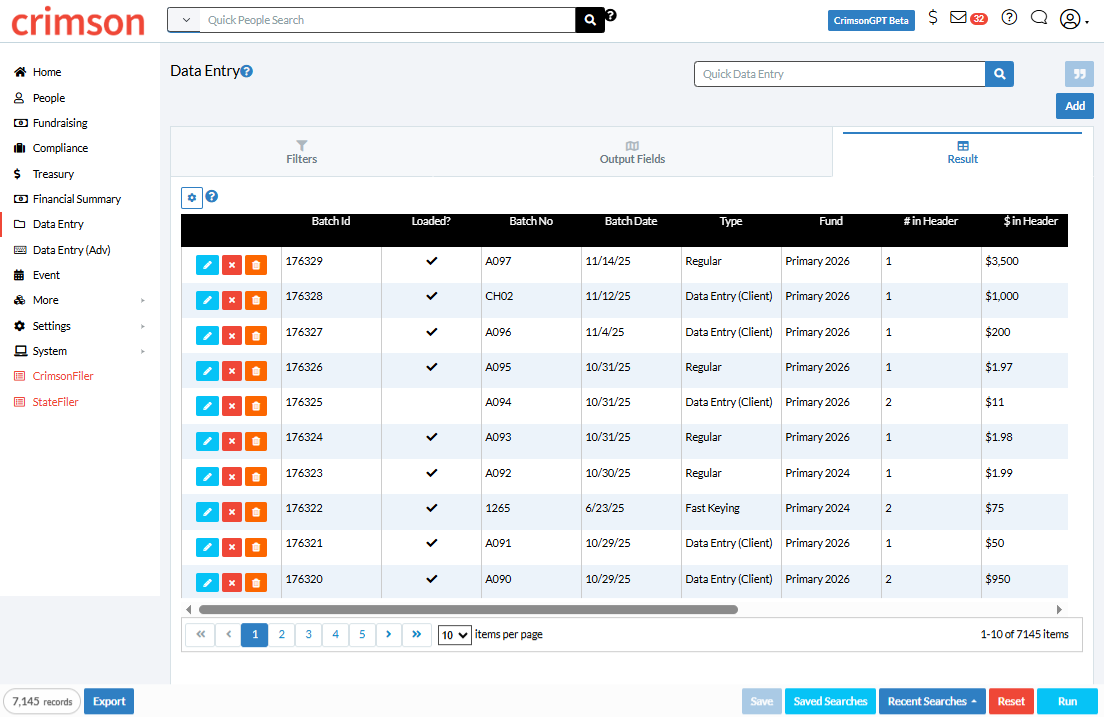
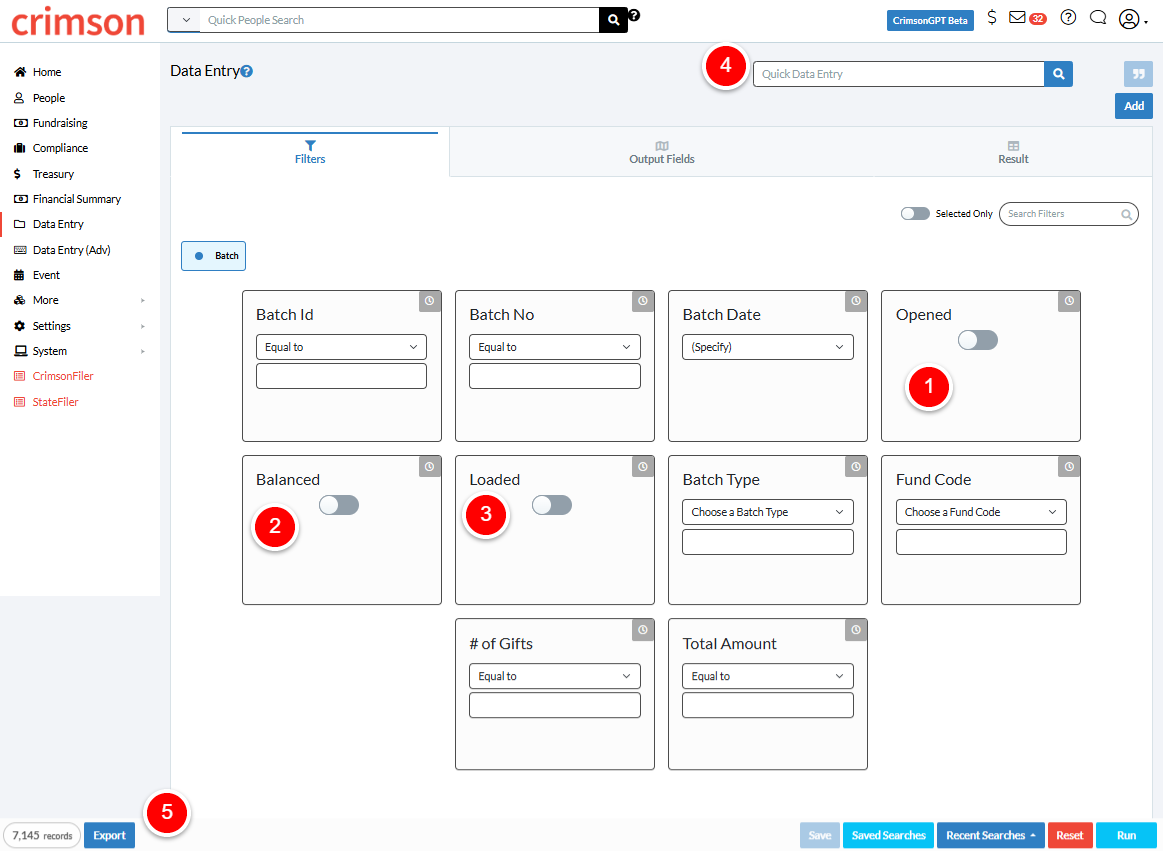
Use the built-in filters to find specific batches, including Opened (1), Balanced (2), or Loaded (3), or take advantage of the Quick Data Entry Search (4) at the top of Crimson for fast navigation.
Need to export or review what’s already entered? Simply click the blue Export button (5) at the bottom of the page to download batch data for reporting or reconciliation.
Creating a New Batch
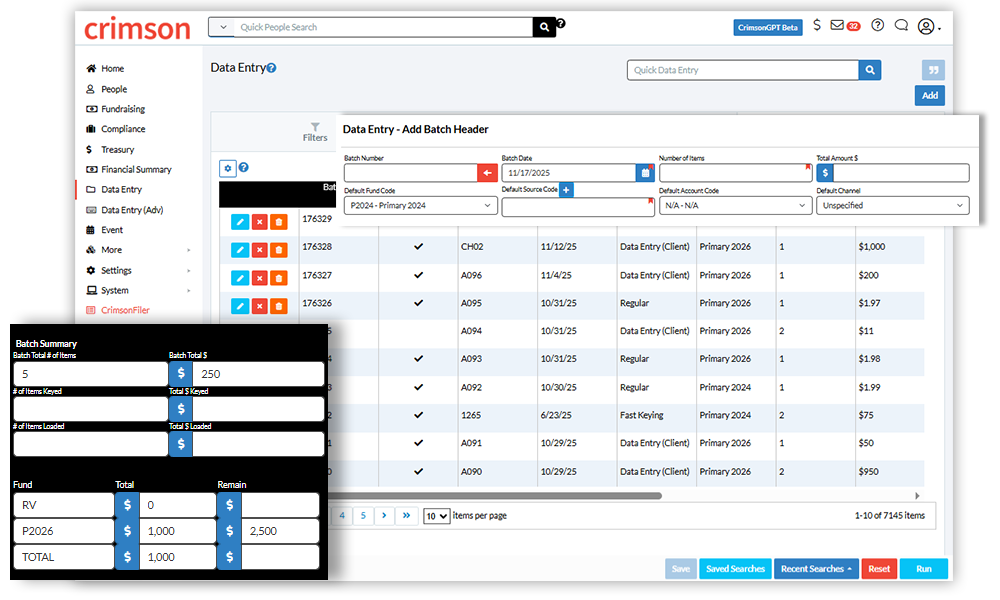
When you’re ready to enter new contributions, click the blue Add button to create a new batch header.

Each batch includes important details like:

1) Batch Number: Enter the batch number to be assigned to all gifts in the batch. Click on the red arrow to auto assign the next numeric batch number. The auto assign numbers will start with 1001. Each time, it’s used, the tool will add 1 digit to the last batch number.
Batch Date: The date applied to all transactions in a batch and is the gift date used in search outputs, FEC reports, and is the primary contribution date used in all reports.
Number of Items: Use this field to the number of contributions that will be loaded in this batch. A single check split between two donors should count as one gift. You can only load the batch when the number of items and total amount $ equal what is keyed.
Total Amount: Use this field to enter the total amount of receipts you expect to enter this batch.
Default Fund: This represents where the funds are going, such as the election or committee. Each batch may use multiple Fund Codes, though only one will be listed as a default. Examples: P2026 (Primary 2026), G2026 (General 2026), etc.
Source Codes: If most of the batch, or all of it, uses the same source code, select it as the default to save time and auto populate that code during data entry. Manually change it per contribution if it differs from the default.
Default Account Code: Not required but use this field to track the bank account each gift is deposited into.
Default Channel: Identifies the fundraising channel a gift was received through, such as web, email, phone call, event, private meeting, etc. It can be used in addition to the Program, Initiative, and Source Codes, but is not a required field.
Once you have entered the batch header information, click the blue Save button. Additional options for entering the records will appear.
Entering Receipts for a Batch
1. After saving your batch header, click the Enter Transaction button to open the Receipt Data Entry window and begin entering receipts.

2. Crimson’s Receipt Data Entry screen makes it simple to find existing donors or add new ones. Search by name, address, or PID, and Crimson will automatically check for duplicates, helping you maintain a clean, deduped database.

Note: When you enter new donor information in the blue bordered fields, Crimson will try to match it to existing records and will prompt you if any are found. If no match is found, the record will be saved as new.
3. Once a donor is selected, you’ll see a summary of their giving history and how much they have available to give based on Fund Code limits or if they are maxed out.

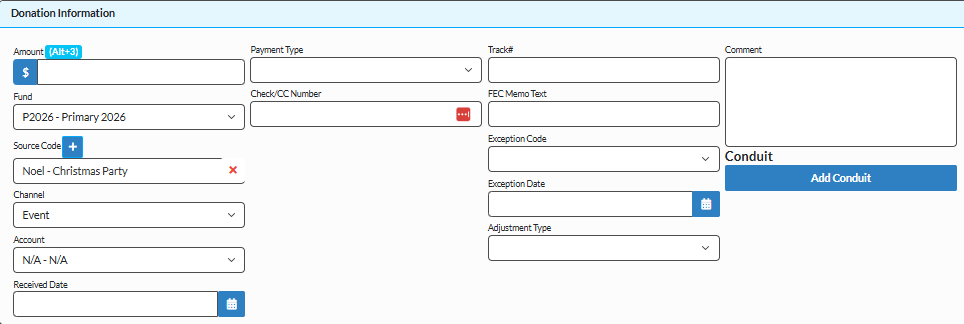
4. Scroll down and complete the Donation Information.
5. Choose Save & Edit Record to review the donor profile or Save & Add to continue keying in new gifts without interruption.

Save + Edit Record: to save the transaction to the batch and then open the people record to make updates to the profile.
Save + Add$: to add the transaction and continue to key in the next gift.
Cancel: to undo any changes and close the data entry window.
Loading and Balancing Batches
As you add receipts to the bath, the black box on the right-hand side shows progress as you enter receipts. Once your batch totals match the header and all data is reviewed, click Load Transactions to finalize the batch.
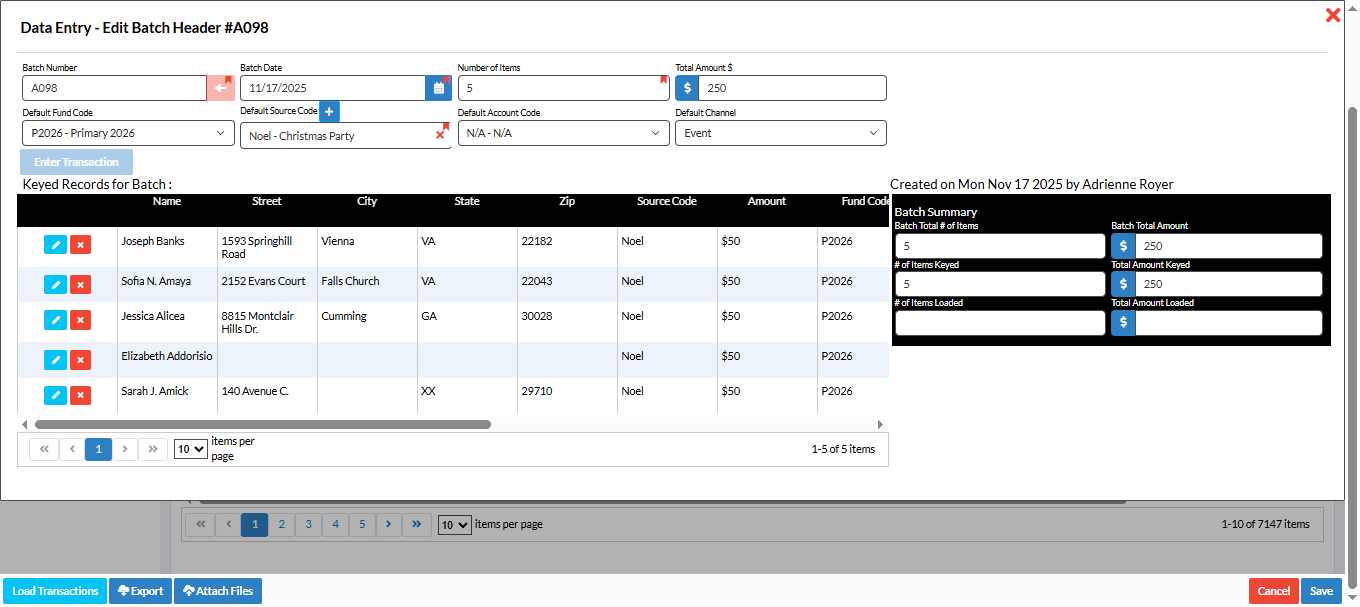
If the button is grayed out, simply verify your totals or edit records using the blue pencil icon until everything is balanced.
For best results, review our Batching and Caging Best Practices and Data Entry Fields for additional information on the Crimson HelpDesk.